
Photography Safaris
What equipment do you need?
You don’t need to purchase the priciest camera to shoot quality images of your African safari vacation—any current digital camera released in the previous few years may provide beautiful images of wildlife. Capturing quality images requires careful consideration of composition and the application of some of the techniques listed below, rather than shelling out a substantial sum for the newest, highest-end camera.
Generally speaking, the ideal choice for a safari vacation is a dSLR (digital single lens reflex) camera with interchangeable lenses. The 200–400mm lens range is ideal for wildlife photography. If you want to capture close-ups (like insects), landscapes, or images of animals in their natural habitat, you should also bring wide angle lenses in the 24-100mm range. Although many dSLRs now come with built-in video cameras, we still recommend that at least one member of your group have a video camera ready. You don’t need to bring bulky flash units or tripods.
So that you don’t run out of power, bring a charger and lots of batteries! When going on a dusty safari drive, make sure you pack lots of cleaning supplies, such as towels and a blower brush, for your cameras. Finally, carry lots of memory cards because you might find yourself capturing a lot more pictures than you anticipated.
Having a pair of binoculars is good for everyone as they are necessary to view distant birds and animals. As previously mentioned, they don’t have to be the priciest, highest-end binoculars; the ideal size is 8/10 x 40.
Equipment List
- Camera
- Extra batteries
- Battery charger
- Camera bag
- Memory cards
- Lens cleaning equipment
- Beanbag (to provide stability for your camera)
- A notebook to record your day’s adventures while it’s still fresh!
- Telephoto lenses (ideally covering 24-100mm and 200-400mm range)
- Zip lock bags (to protect equipment from dust) but note plastic bags are banned in Kenya so use a cloth alternative!
Before your Safari Holiday – Practice!
Try to spend some time becoming acquainted with your camera and shooting some practice photos before you leave for your African safari vacation, especially if it’s your first camera or if you don’t use it very often. Any topic will do, including your dogs, birds in your garden, or anything else that moves.
Have you read the handbook as well? Admittedly, they are not really good books to read, but knowing how to use the camera rapidly comes in handy while going on a safari drive. As animal behavior is demonstrated in front of you, you won’t have time to read the handbook since the activity will be over before you find the appropriate page!
Ideally, you should be able to change important camera settings, like exposure, without taking your eyes off the viewfinder.
Be patient!
There are never two same days when it comes to seeing wildlife on a safari. There will be days when you see very little and days when it seems like there are animals everywhere. Some folks snap a few short photos of as many different animals as they can in an attempt to “tick off,” then ask to move on. Sadly, though, animals won’t instantly pose for you, and skilled photographers will often spend hours observing a subject in order to capture the perfect picture.
This isn’t really achievable on a normal safari, but you’ll frequently discover that if you have a little perseverance and stick with a topic for a little while longer, something more intriguing may happen that you can capture on camera. This advise applies to both photography and ordinary game observing. If you can practice patience and dedicate some time to learning about your subject, you will frequently reap the benefits. It certainly makes for a more laid-back safari!

Light
The most moody and creative nature photos are often enhanced by excellent lighting. When the sun is lower in the sky in the early morning or late afternoon, this is sometimes referred to as the “golden light.” This is the time of year when softer, warmer, or “golden” light will enhance your images. The sun is above in the middle of the day, which often means harsh shadows that don’t make for very nice photos. Because it’s cooler during the “golden hours,” animals are also more likely to be active, which raises the possibility of witnessing wildlife and catching it in action—rather than just lounging in the shade! You now understand why we wake you up so early every morning!
Techniques
Composition – the “Rule of thirds”
A really important aspect of good wildlife photography is composition. This relates to the position of the subject(s) within the frame. The “rule of thirds” is a well known compositional technique that can make a big difference to the impact of your photos and require little if any technical skills.
When breaking down a picture frame into nine equal pieces, horizontally and vertically, the best wildlife photographers will frequently purposefully position their subjects at the intersections of these lines or directly along them. Using the rule of thirds makes your images more visually appealing to the human eye most of the time.
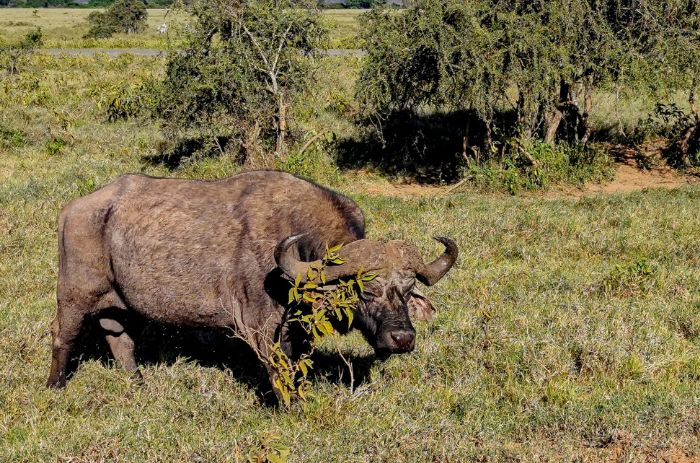
Don’t forget your environment
When using a long telephoto lens, it’s common to feel tempted to include your subject in the frame whenever possible. This can provide for some fantastic portrait shots, and you’ll see some amazing wildlife shots that make use of this technique. On occasion, though, it’s beneficial to take a step back with your telephoto lens and attempt to capture some of the background of your subject. You can improve your photo collection and offer your friends and family a true impression of what the African bush looks like by attempting to capture some of the amazing scenery seen in the African bush. They won’t know if you consistently fill the frame with your subject!
You can also be creative in the opposite sense, by getting really close up shots of a lion’s eye, or an elephant’s trunk, for example.
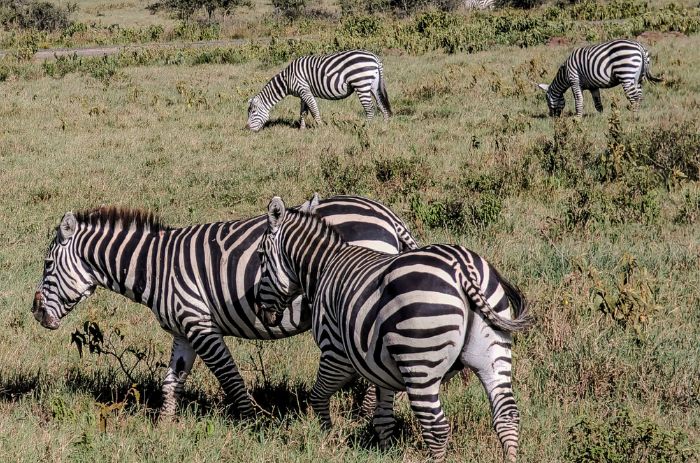
Try to capture some action.
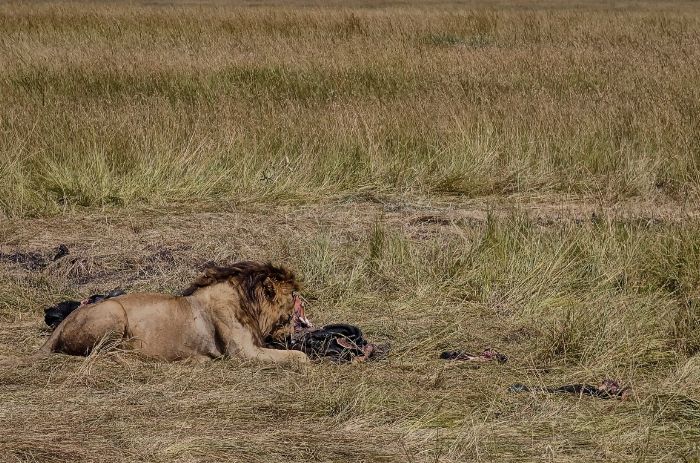
In addition to capturing portraits of your favourite safari animals try and add some variety to your photo collection by capturing some action. Most African wildlife are social creatures and will spend some of their time playing, grooming each other or interacting in other ways. Capturing these moments will make your photographs more interesting as you will be capturing their behaviour. As explained above, while this often requires a bit of patience (particularly with sleepy lions!) the rewards can be well worth it.
Shutter speed
To freeze the movement of a moving animal you will need to keep the shutter speed high, ideally around 1/1000 of a second or higher depending on the speed of movement and the actual subject. For example, trying to freeze a bird in flight will require much higher shutter speeds. An alternative approach is to use the panning technique where you try to follow the movement of the animal so it stays sharp in the picture but the background is blurred. For this try somewhere between 1/8 to 1/30 second shutter speed.
Stay low!
Setting up at a low angle of view is one of the most underestimated methods for taking excellent wildlife photos. Pop-up or detachable roofs are a common feature on safari vehicles, enabling passengers to observe wildlife from above. When an animal is among longer grass, for instance, this may be beneficial. However, it is usually not the most attractive to take a picture of an animal that is beside your car and sitting down while you are standing and staring downhill. If you take a seated photo with your subject at eye level to obtain a lower angle of view, the image will have considerably more impact.
Portraiture and depth of field
If you’re trying to capture a close up view of a single subject focus on getting the eyes pin sharp, and try and get a diffused (blurred) background. This requires careful use of depth of field – a shallower depth of field (helped by using a lower ‘f’ stop) will help blur the back ground and make your subject stand out in the photo. The downside is that the shallower depth of field that helped blur the background will also narrow the area of sharpness often to just a few inches – hence be careful to focus on the eyes as they may be the only ‘pin sharp’ element of the picture.
On a related point, when looking at your subject through the viewfinder often we forget to look at distractions above, below and to the side of the subject. Odd looking twigs, other safari vehicles in the background and other ‘clutter’ can often weaken a picture but can often be avoided by moving very slightly the position from which you take the picture. Try and get as clean and uncluttered surrounding to your subject as possible so it stands out in the frame.
Unlock the Beauty of Kenya’s Parks Through Your Lens! Join Daylight Adventures & Safaris on an unforgettable Photography Safari that promises to capture the essence of wildlife and landscapes like never before. Don’t miss the chance to seize breathtaking moments in Kenya’s renowned parks. Book your adventure now and let your camera tell the story!